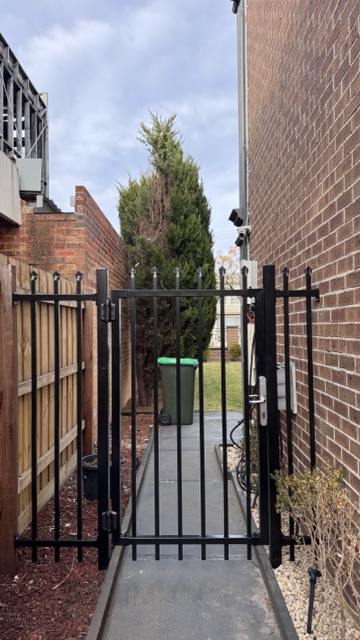
How to DIY custom pedestrian gate with commercial fence panel?
- Leo Xiao
- Jul 23, 2025
- 2 min read
Making a custom pedestrian gate using a commercial fence panel is totally doable — it’s a smart way to save money and still get a solid, professional-looking result. Here's a detailed step-by-step guide:
What You’ll Need:
Materials:
Commercial steel or aluminum fence panel
2x vertical gate posts or side rails (steel or aluminum tubing)
2x horizontal rails or brace bars (top and bottom)
Welds or heavy-duty brackets/fasteners
Hinges (gate-grade, welded or bolt-on)
Latch or locking mechanism
Optional: diagonal brace (to prevent sagging)
Rust-resistant paint or finish coat (if cutting into metal)
Tools:
Angle grinder / metal saw
Drill + metal bits
Welder or self-tapping screws + brackets
Clamps
Measuring tape & level
Safety gear (gloves, goggles)
Step-by-Step Instructions:
1. Measure and Plan
Measure the gate opening (width and height).
Deduct about ½–1 inch from the width for clearance and hinge space.
Decide if the gate will swing inward or outward (inward is more common for residential gates).
2. Cut the Fence Panel to Size
Use an angle grinder or metal saw to cut the commercial fence panel to your desired gate width and height.
Clean all cut edges and smooth with a file.
3. Build a Frame Around the Panel
You need to turn that panel into a sturdy rectangle.
Option A: Welded Frame (Stronger, Cleaner)
Cut 2 vertical and 2 horizontal steel/aluminum tubes to size.
Weld the corners to form a rigid rectangular frame.
Weld the fence panel inside (or to the back) of the frame.
Option B: Brackets + Screws (No Welding)
Use pre-drilled L-brackets or gate corners.
Bolt or screw the fence panel into the rectangular frame using self-tapping metal screws.
Use clamps to hold things square while drilling.
4. Add a Diagonal Brace (Anti-Sagging)
Install a diagonal brace from bottom hinge side to top latch side.
Weld or screw in place.
Optional but highly recommended, especially on gates over 3' wide.
5. Attach Hinges
Weld or bolt gate hinges to the vertical frame side.
Position 1 hinge about 6–8 inches from the top and bottom of the gate.
Attach the other side of the hinge to your gate post or wall.
6. Install the Gate
Hold the gate in place with spacers or blocks.
Mark and drill holes for hinge mounting if bolting.
Attach the hinges and test the swing.
7. Install Latch/Lock
Use a gravity latch, deadbolt, or magnetic latch depending on need.
Make sure it lines up when the gate closes flush.
8. Finish It
Touch up exposed metal with rust-inhibiting primer + paint.
Ensure all fasteners are tight and rust-resistant.
Add gate stop or bumper if needed.
Bonus Tips:
For added style, weld on decorative scrolls or top caps.
Consider adding rubber gate stops to reduce noise/wear.
Use a drop rod if it’s a double gate or needs to be locked at the bottom.


Comments